
How to Install Vinyl Plank Flooring WITHOUT REMOVING BASEBOARDS | DIY Click Laminate Flooring Tip
How to Install Vinyl Plank Flooring WITHOUT REMOVING BASEBOARDS | DIY Click Laminate Flooring Tip
 2 Part Video: Skip to CHAPTER 3 (3:10) if you don’t want to watch the why, prep work or humor in this converted blog post.
A pithy howto on installing click laminate flooring WITHOUT removing baseboards. Luxuriously paint all your walls/trim/ceiling FIRST guilt-free because you are protecting your flooring BECAUSE IT’S NOT INSTALLED YET! Presenting one possible solution for your vinyl plank installation project (because let’s be honest, there is more than one way to do this).
Sections:
0:00 Intro
0:56 Why Put Baseboard in First?
2:13 Prep Work for this Method
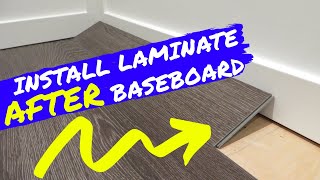
3:10 How to Install the Last Row
5:56 The Room is DONE! (b/c you painted walls first!)
Thank you to @Botak Bishop for adding his suggestion in the comments: If this method does not work for you, consider only removing the last wall of baseboard. A great suggestion for minimizing damage and work on the back end of the project!
ALSO, the installation method described in this video does not work well with Coreluxe.
If you do find a better way, please add it to the comments for other fellow DIY’ers!
LAMINATE FLOORING CALCULATOR:
TOOLS / MATERIALS NEEDED:
○ “Floor Installation Tool” – scrap wood in the garage/shed/your neighbor’s garage
○ Hammer or Mallet
○ Carpet Tape: https://amzn.to/3aQc3Ku
○ Patience
You’ve got this!
DISCLAIMER / HONESTY POLICY: The links in this description may be affiliate links. If you purchase a product or service with the links that I provide I may receive a small commission. You are not obligated to do so, but it does fund these videos in hopes of helping you through your reno and there is no additional charge to you.
RELATED VIDEOS:
○ Protect Those New Floors – Water Monitor + Shutoff Playlist – https://www.youtube.com/playlist?list=PLzio78R2Y1xlJFEiANxAue-w5zc-xVRbe
○ Repainting a Fiberglass Front Door Playlist – https://www.youtube.com/playlist?list=PLzio78R2Y1xn7c5suQqTQ_EwNHDDDqbWp
COME SAY HI!
Blog: https://www.justneedspaint.com/
Instagram: https://www.instagram.com/justneedspaint/
Pinterest: http://pinterest.com/justneedspaint
What brand/model is the flooring? I like it.
The H pattern by not randomizing some stands out so much in that install
Thank you been wondering how to do this! Starts at 3:25 for me
I assume you used spacers under the baseboard when laying the first row? If so, how did you get them out once the flooring is in?
Way easier said than done! There’s a reason pros just go ahead and take down the base board first.
How do I transition from vinyl tile to already laid carpet?
Way easier to just take a small wood chisel or linoleum knife and shave the locking tab off. I use wood glue Adler that and it works just fine. Make sure not to shave the entire tab off but just the nub so you still have tabs on both pieces to overlap. Put very light glue on the piece on the floor, lay in the new one and put some weight on it overnight.
Thanks for this. Was dreading ripping out the skirting board.
This will not work with most laminate flooring!!!!
Although the video could have been shorter and more to the point I absolutely love the fact that even though I am a man that likes women that you didn’t feel the need to wear a skimpy barely within guidelines outfit to convey the information. When I am genuinely looking for information I want information and if I want “other” things there is a lady in my house and web Pages specifically for the other.
This is a 6 min video that could have been explained in 1 min. Being succinct on Youtube seems to be a lost art these days.
Cool tip but damn that black dripping paint was unbearable to watch haha.
Is quater round out of style these days or something? Maybe im behind on the trends 🤔😅 nice trick though
What about the 1/4 expansion rule?
Hubby and I tried this and it worked like a charm! Thanks, big time!
Another method (as per the instructions) is to chisel off the locking tab on the groove and use a fast drying adhesive such as plastic hot glue or gel super glue to join them instead of the locking tab.