
How to DIY an Entryway Storage Bench with Michaels Crates
How to DIY an Entryway Storage Bench with Michaels Crates
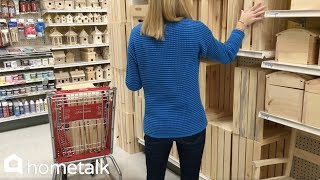 Do you need a little extra storage space in your entryway? Here’s how to make an entryway bench with crates from Michaels. Michaels crates are an inexpensive way to give yourself the extra entryway storage space you need. The entire project from start to finish only costs $30 to make. Everyone will be envious of your high-end entryway storage bench when you’re done! If you need more entryway storage space, this DIY Michaels crates storage bench is for you!
Click here to see the full step-by-step instructions to DIY your own entryway storage bench with Michaels crates: http://hmt.lk/2FgZcjA
hometalk: create the home you love
Check out our website: https://www.hometalk.com/
Subscribe to our YouTube channel: http://bit.ly/2oKrnRR
Like us on Facebook: https://www.facebook.com/Hometalk/
Follow us on Twitter: https://twitter.com/hometalk
Follow us on Pinterest: https://www.pinterest.com/hometalk/
Follow us on Instagram: https://www.instagram.com/hometalk/
On the Woodglut website, you buy access to thousands of projects once.
Great project!
Awesome, I love this
Maravilhosa
Best DYI bench ever!!!
It’s so simple, Just go to woodprix page and enter woodworkers world.
Oooh, I love this idea!!! My teens would totally be into making one of these!
Great idea!! Can you do a class storage bookshelf?
woodprix includes very useful plans with all details I need
Great diy!!! I have been searching for an entryway bench for sometime now, I have found the perfect idea! Thank you so much for sharing, it is really appreciate d. Nana
Diy dork
Woodprix has very good designs and plans.
I was wondering about how to do a cheap easy tv stand. Somthing rustic but cute. This is the winner!
Very clever and creative!!! I have been looking for a piece of furniture like this and here I can make it myself–Can’t wait to get started!!! Thank you for sharing!!!
Mine works too. I used woodprix plans and build it without any problems.
I just wanna know where you bought your purse from. 😂 lbvs. It’s cute!
Love the idea 😀
Sweetheart this is just beautiful! Fabulous! ❤ Thank you
How much did it cost you?
What size are your crates? ?
I am in LOVE! Thanks for making this video! It’s perfect for my next project
I use Woodglut plans for all my joinery. Google and try it out.
amazing!!!!!
Hey! That’s smart…
How much all these things cost you? I can buy a high quality one from IKIA with same budget.
this is so amazing!
Omg! I’ve been looking for a bench idea! Thanks. I put one outside and painted it with marine varnish. Thanks again.
K shoes
Way way way too much glue……………
Wow it turned out really nice!
Woodglut has a lot of plans to choose from.
Maybe screw the top on from the underside through the crate fist so you don’t see screws on seat surface. Cool project.
Great to see that… I made it too. Plans from woodprix helped me a lot 🙂
Definitely doing this this weekend
Girl you need yourself a battery powered drill
Very cute spread out the glue before joining and maybe use pocket hole jig to make a sturdier bench but it’s actually very nice
I bought plans from woodprix and I made it very fast.
Hi, what kind of glue do you use? and where do you get the flat board?
NICE
Love.it!
Clear and transparent plans with detailed instructions can be found on the Woodglut website.
Grab grab grab grab
Love it. I think l can do that!
Very cute n useful idea!
that easy and awesome
Ok peeps, I just went and bought everything to make this bench. It cost me approximately $68 plus an extra $20 for pillows. I bought exactly everything as cheap as possible and as shown here. Keep in mind I live in Seattle one of the most expensive places on earth lol. I’ll repost pics when I’m finished.
I love this idea! I’m so going to build one for each of my kid’s rooms and personalize them to fit each of their themes. 6 rooms total, I’m gonna save a bundle! Thank you so much for this video ❤
That’s actually pretty cool
but my wife has 300 pairs of shoes
Neat-o! I probably would have stained it first and installed the wheels last. But I love this idea. So swiping it for my craft room!